- Thu 06 September 2012
- Cartographica
- Rick Jones
- #buffer, #earthquake
There was a large (7.6) earthquake yesterday in Costa Rica. The earthquake signaled tsunami warnings in the region, but fortunately there was no tsunami. So far there have been three deaths reported. In the past 40 years Costa Rica has experienced more than 30 earthquakes of 6.0 magnitude or higher. So, needless to say Costa Ricans are accustomed to these types of events.
The purpose of this post is two-fold. The first purpose is to draw people's attention to the major geologic event that occurred in Costa Rica yesterday. The second purpose is to show a couple quick methods for creating concentric rings, which we have had questions about from some of our customers in the past. Concentric rings are used in a variety of ways, but one way you often see them used is in reporting the location of earthquakes.
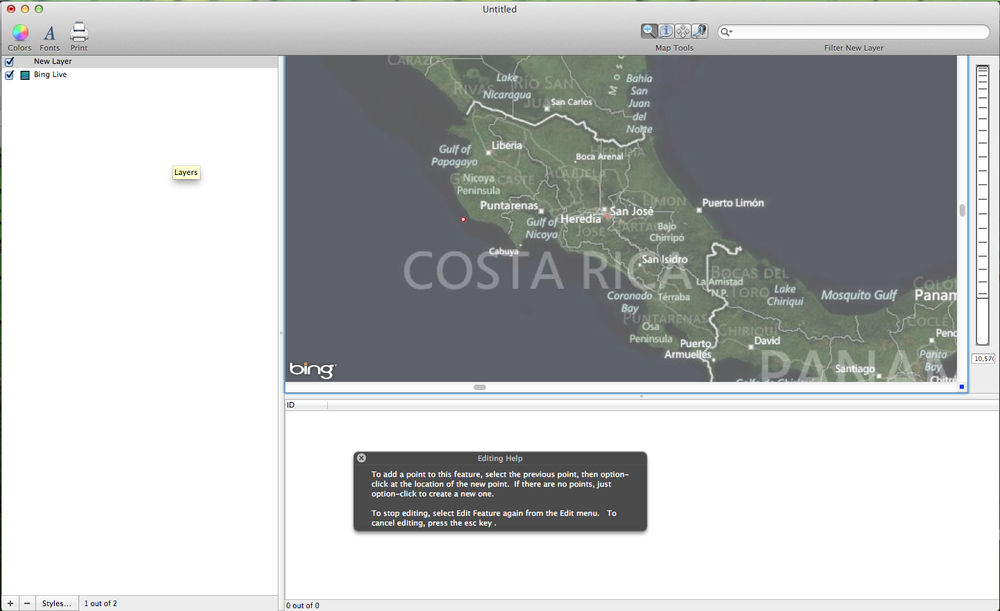
Start by Adding a Live Map by choosing File > Add Live Map. After you add a live map choose Layer > Include in Map Extent. Including the Live Map layer in the map extent is necessary because it will enable the zoom functions to operate beyond the extent of the point layer that you are about to create in the following steps.
According to reports the earthquake occurred just off the cost of Costa Rica. To add a point representing the location of the earthquake choose Layer > New Layer and then choose Edit > Add Feature. A window will appear allowing you to choose the type of feature you would like to create. Select Point and then place the point by holding down the option key and clicking on the location about 50 miles off the coast. See below for an example.
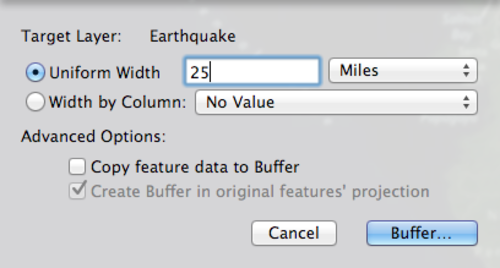
There are two options for creating concentric rings. The first method involves using the buffer tool to create rings around a point at specific distances. To create a buffer choose Tools > Create Buffers for Layer's Features. A window will appear that will allow you to set the parameters of the buffer. Set the Uniform Width distance to 25 Miles. See below for an example.
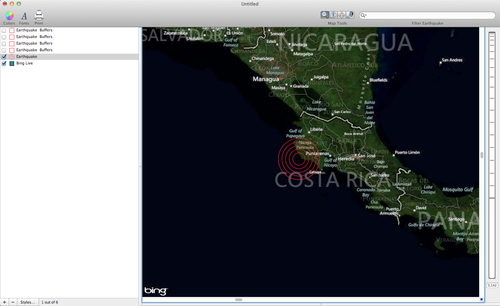
To create new buffers at different distances select the Earthquake point layer in the Layer Stack, and then repeat the steps above to create buffers around the Earthquake point at 10, 50, and 75 miles. (Note: Be sure after each buffer is completed that you re-select the Earthquake point layer before creating the next buffer). When completed you will have four layers that are represented on the map by white circles. Double-click on the top buffer layer in the layer stack, click on the Fill box and then change the layer opacity to zero. Next click on the stroke box and change the color to red. See below for an example.

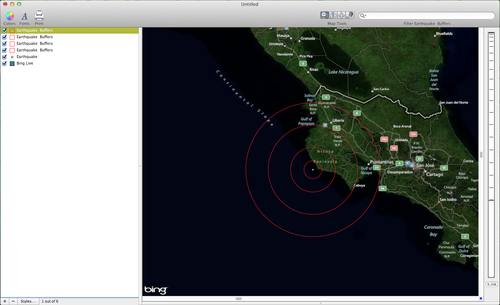
To make all of the buffer layers have the same layer styles drag the top layer in the layer stack (the one you have already changed) on top of the other buffer layers. This will automatically match the layer styles. See below for a final image of the concentric rings created by using buffers.
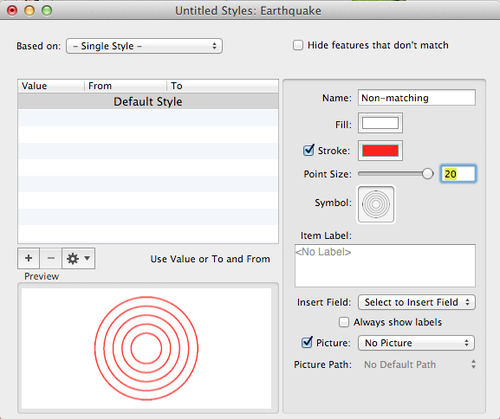
The other method for creating concentric rings is to use an image from the internet. This method is not as precise as the buffer method because you cannot designate the distances for each ring. However, it is a quick alternative method for creating concentric rings. The first step is performing an image search for "concentric rings" using Google or a similar search engine. Find a clean looking example of concentric rings. Double-click on the earthquake layer in the layer stack and then click and drag your concentric ring image to the symbol box in the Layer Styles Window. Finally, change the stroke color to red and increase the point to a desired size . See below for an example of the Layer Styles window.
Uncheck the four buffer layers that you created previously to reveal to new concentric rings that were created with an image from the internet. See below for an example of the final map.