- Mon 22 October 2012
- Cartographica
- Rick Jones
- #analysis, #overlay
Cartographica has had the ability to add and create new features for a while now, but new in version 1.4 are the snapping tools, designed to make the Add Feature process simpler and more efficient. Snapping tools make it easier to draw point, line, and polygon features by automatically connecting to Vertex, Edge, or Grid features on a layer. That is, if your goal is to create a new layer, or to update an old layer, then using the snapping tools allows you to more easily draw the new features. We can illustrate with an example.
In the following example you have a street layer from Lexington, Kentucky. The street data was collected from the U.S. Census 2000 Tiger/Line Files, but is downloadable by click on this link, download streets data . The street layer is incomplete due to the demolition of an old public housing complex that has since been reconstructed. During the rebuilding of the housing complex the street network was changed and redesigned. Fortunately, you can easily update your street layer by using newer satellite imagery and the snapping tool to redraw the street network.
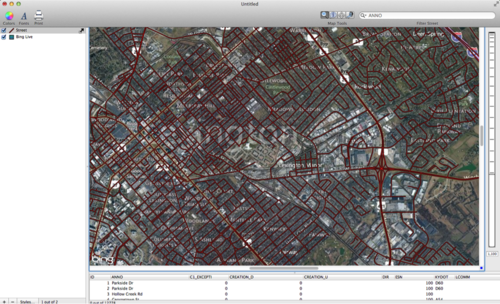
Begin the example by importing the Lexington street file by choosing File > Import Vector Data. Also, add the satellite imagery by choosing File > Add Live Map.
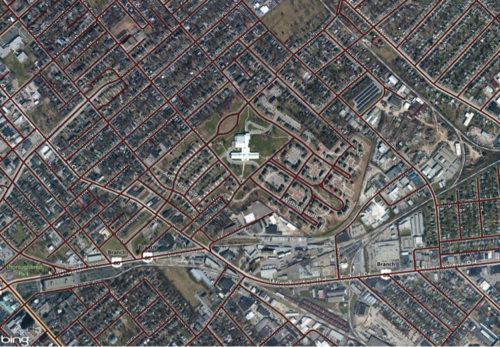
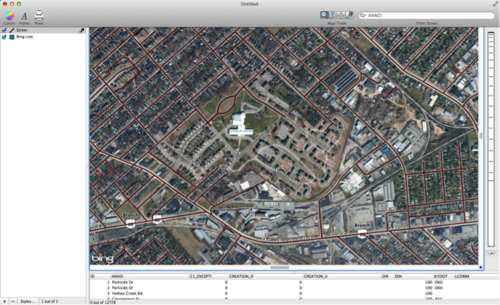
After the data are visible in the Map Window zoom in to the area east of downtown Lexington that appears to have an incomplete road network. See below for the area of interest. We are interested in the area in the center of the map.
A closer look at the target area.
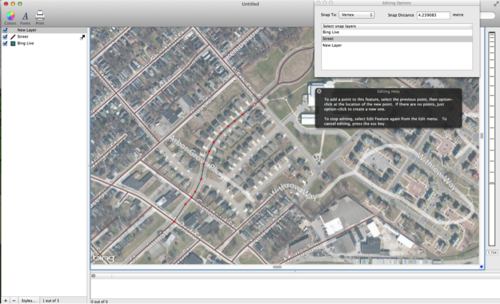
You can complete the street network by first adding a new layer by choosing Layer > New Layer (Move the new layer to the top of the layer stack). Choose Edit > Add Feature. You will be prompted to select the type of feature you would like to add. Select Line. The Editing Options window will appear. The Editing Options window has two options within it: First, the Snap to drop down menu allows you to select the type of snapping method you would like to use. The Vertex option allows you to snap to any vertex, or line end point. The Edge snap option allows you to snap to edge of any line or polygon edge, and finally the grid option allows you to snap to points that on a grid. Second, the snap distance is a parameter that defines how sensitive the snap feature is when snapping to any of the options listed above. For example, if the snap distance is set to 10 meters and the cursor is 15 meters from a vertex then the snapping function will not snap. Below is an image of the Editing Options window.
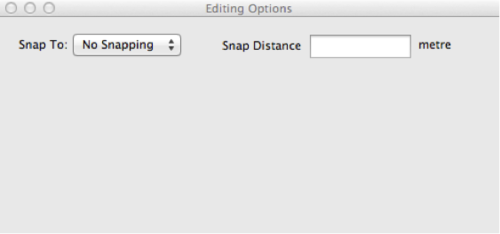
Change the Snap to menu selection to Vertex. When you select the Vertex option a new pane will appear within the Editing Options window. Here you are able to select the layer that you would like to snap to when adding new features. Select the Street layer. The Snap Distance will automatically update (The automatically updated snap distance is fine for now). You are now ready to begin adding the new line features. To add points hold down the option key and click near the end point of a line feature on the street layer and draw a new street making sure to trace the streets in the corresponding satellite imagery. After you have drawn the new street press the return key. See below for an example. You should have noticed that when the snap function is working the cursor turns a bright green color.
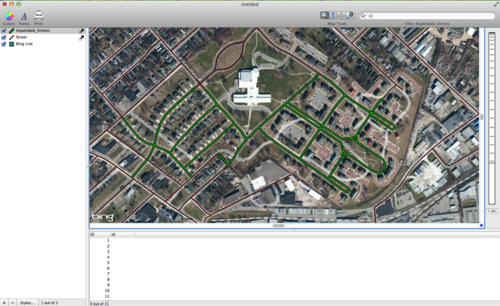
To continue adding new features choose Edit > Add Feature and then draw another new street. Repeat this process until you have completed the street network in this area of Lexington. Below is an example of the new layer. Note: the layer has been renamed Aspendale_Streets.
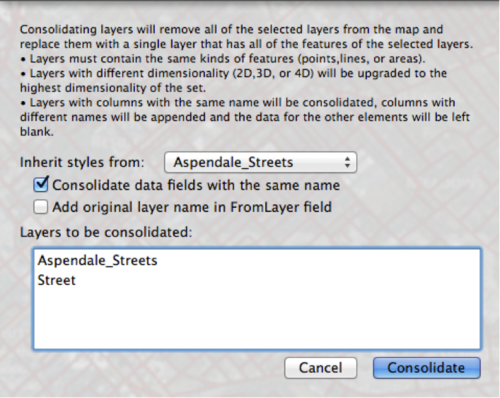
The final step is to merge the Streets and Aspendale_Streets layers to create a single layer that includes the updated street network. The updated layer will contain all of the streets from both layers and the corresponding attribute data from the original street layer. This is advantageous because all of the fields that are contained within the street file (i.e. the street name, speed limit, address, etc.) will be included in the new layer. This will allow you to manually update all of these attributes on the new Aspendale_Streets that have been drawn. The same method can be used to update any street file and allows you to continually update your data to real-time accuracy. To merge the layers first select each layer in the Layer Stack using command click. Choose Layer > Merge Layers. The following window will appear. Set up the window to match the image below and then click consolidate. The final output will be a single layer that includes the data from both layers.
Final Map with Consolidated Street Networks.